

Having Google Chrome automatically fill out online forms with your name, address, phone number and even your card or bank details can certainly make for a swifter checkout when shopping at a new site. But if you’re concerned that the data you allow the browser to access is becoming too personal, it’s easy to remove certain parts or delete everything in one go. We show you how to manage and delete all the information stored in Google Chrome’s Auto-fill feature.
It’s also worth knowing that there’s a more secure alternative: a password manager. You might decide you don’t trust these any more than Google with your data, but apps such as LastPass can store not just passwords but all the details that Chrome can, such as addresses and card numbers. Check our roundup of the best password managers for more information.
How to restrict Auto-fill in Google Chrome
As all the data used by Auto-fill is stored in your Google account, you may prefer not to remove the information entirely, but rather restrict the feature so that you control when and where you provide your details.
To do this, open Chrome on either your desktop or mobile, then tap the three dots in the top right corner and select Settings from the drop-down menu.
On desktops you’ll see there’s an Auto-fill section in the left column, which you’ll want to select, while the relevant settings are under the Basics section on mobile.

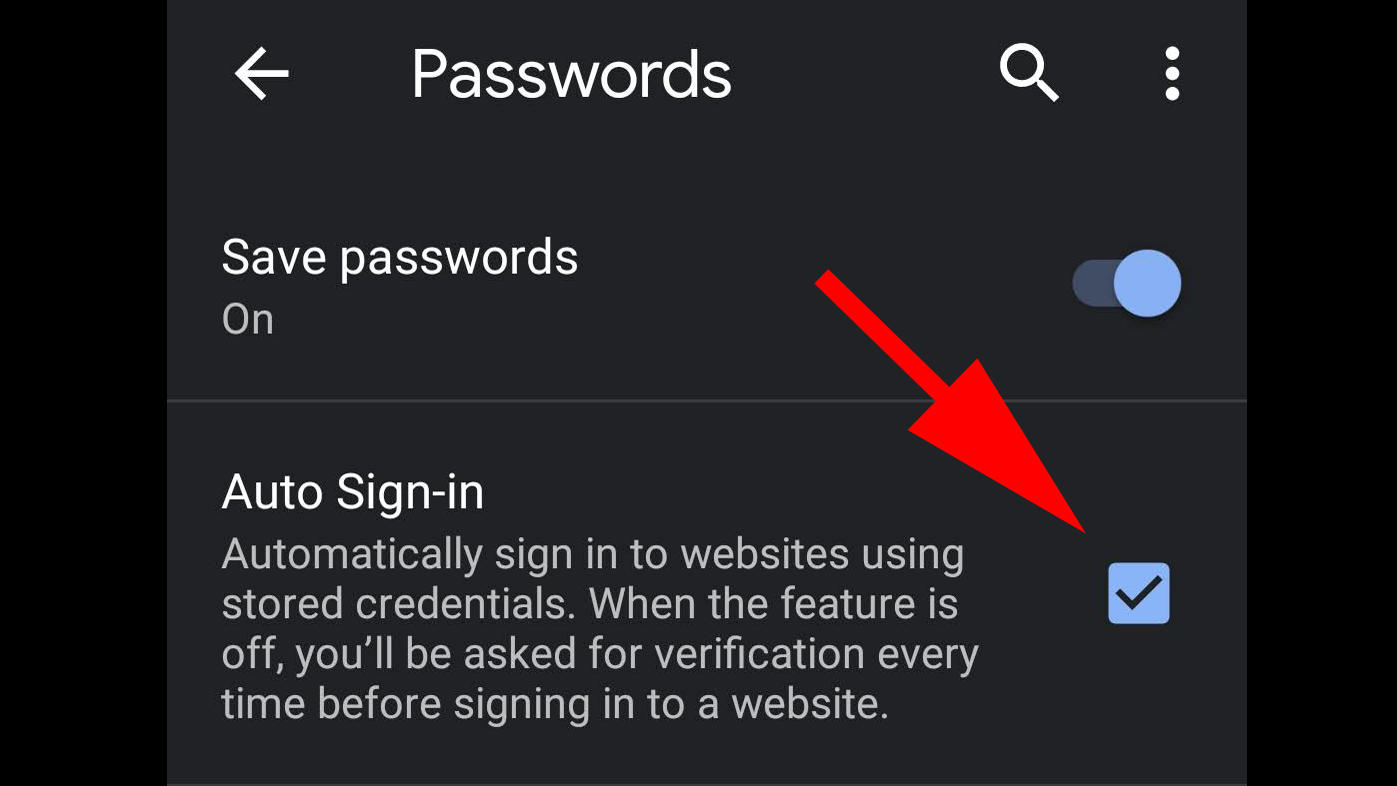
There are three main headings for the data Auto-fill uses: Passwords, Payment Methods, and Addresses and more. Selecting one of these will reveal a sort of master switch you can use to disable that particular part of the feature. So, for example, in Passwords you’ll see Auto Sign-in with a tick box to the right. Untick this and you’ll be now be asked whether you want to use your stored details to sign into a site, rather than Chrome doing it automatically.
The same will be true if you turn off Save and fill payment methods in the Payment Methods section or Save and fill addresses in the Addresses and more section.
How to delete specific data in Google Chrome Auto-fill
There may be instances where you want to remove specific information used by Auto-fill, such as erroneous login details for a certain site, but leave the majority as it is. To do this, open Chrome and tap the three dots in the top right corner, then select Settings. Again, head for the Auto-fill section on desktops or Basics on mobile.
Now, select the area where the data will be found (Passwords, Payment Methods or Addresses and more) and look for the information in question. On desktops you should see three dots to the right of the data, clicking on which allows you to either Edit or Remove. Those using a smartphone or tablet should tap the data field and then use the Bin (Trash Can) icon at the top of the page to delete the entry.

How to delete all data in Google Chrome Auto-fill
If you don’t want Google to hold any of your passwords, card details or addresses, it’s not difficult to remove all of these with a few taps of a screen.
Open Chrome and tap on the three dots in the top right corner. Next select History > History (or press Ctrl+H) and you’ll see a new window appear. If you just want to remove Auto-fill data, click the Advanced tab then scroll down until you find the Auto-fill form data option and ensure that it is ticked, while unticking anything you want to remain. Scroll back to the top and check that the Time range option is set to All time, then tap the Clear data button.

Those who want to remove all their stored data should follow the steps above but ensure that all the available options are ticked before you hit the Clear data button.
As mentioned, if you want a secure way to keep your data available without typing it in manually, then take a look at the best password managers. If you’ve not come across these apps before, here’s how to use a password manager. Such apps are especially handy if you use the same login details for all your accounts. (Tip: Never do that).
Author: Martyn Casserly, Contributor, Tech Advisor

Martyn has been involved with tech ever since the arrival of his ZX Spectrum back in the early 80s. He covers iOS, Android, Windows and macOS, writing tutorials, buying guides and reviews.