
Most of us use our phones for several hours each day, so it makes sense to have everything that’s important to you stored on it. Whether it’s your entire collection of photos, important documents or key apps, smartphones are a digital representation of our lives.
However, it does mean your phone’s storage can quickly fill up. Most devices come with at least 128GB these days, but some still offer 64GB or even less. A big chunk of that is taken up by Android itself, so you might find yourself running close to capacity or getting the dreaded low storage warning.
On many phones, this can be solved by popping a microSD card into the SIM tray, allowing you to move big files off your internal storage. But what if your handset doesn’t support it?
Moving everything onto another device and performing a factory reset is something else you might have considered, but that’s often more drastic than necessary.
Luckily, there are a few simple steps you can follow to free up a significant amount of space on your Android phone. Even if you’ve not run into any storage issues just yet, managing your storage properly can help keep things ticking along nicely performance-wise.
1. Move photos and videos into cloud storage
This is possibly the one item on this list that will have more impact than any other. Photos and videos take up a huge amount of space, and the more this builds up, the less likely you’ll want to sort through them.
Fortunately, almost all Android phones have Google Photos pre-installed. Anyone with a Google account gets 15GB of storage for free, although this is shared with Gmail and Google Drive.
If you’ve never set it up before or don’t have the app pre-installed, here’s what to do:
- Open the Google Play Store and search for Google Photos
- Next to the relevant result, tap ‘Install’
- Once installation is complete, tap ‘Open’
- When prompted, tap ‘Allow’ to provide access to the photos and videos stored on your device
- From the next screen, make sure you choose ‘Turn on backup’
- From the next screen, choose between ‘Original quality’ and ‘Storage saver’. The latter allows you to store more, but at a lower quality
- Skip past the three highlights pages
- Tap your icon in the top-right corner, and you should see a message saying ‘Backup is on. Getting ready to back up’
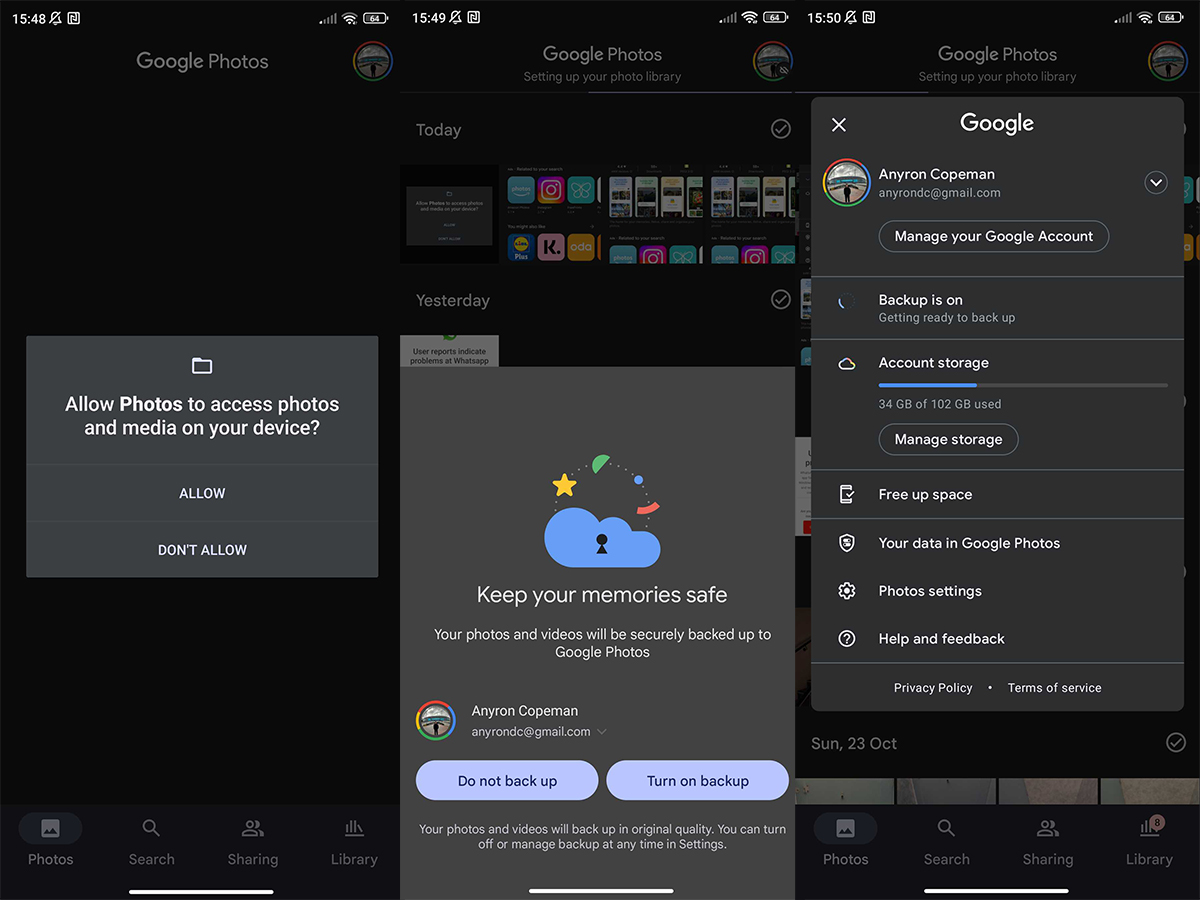
Anyron Copeman / Foundry
You can now leave the app to back up in the background. From now on, all your locally stored photos and videos will be automatically uploaded here and available across all your devices – up to that 15GB limit. Unlimited free storage ended in June 2021, so you’ll need to pay for a Google One subscription for any more. Plans start at $1.99/£1.59 per month.
Alternative options such as pCloud are available, which offer 10GB of free storage and the option for one-off lifetime plans. There are other alternatives to consider, but Google Photos’ free tier is the best option for most people. Even if you only move some of your files, it’ll make a significant difference.
2. Move data to Google Drive
Since you’re using a phone that runs a Google-owned operating system, it makes sense to make use of Google’s other cloud-storage tools, too. Though your document files will take up significantly less space (unless you have a lot of them, or a lot of multiple-page PDFs for example), all these can be moved to Google Drive. This will create a useful backup and make those files accessible from any online device.
As mentioned above, you get 15GB for free, combined with Google Drive and Gmail. But one Google One subscription will cover all three.
There isn’t a way to automatically upload files to Google Drive on your phone, but it’s easy to add them manually:
- Open Google Drive
- You’ll probably be presented with the ‘Suggestions’ page. If not, tap it from the top of the screen
- From the bottom-right corner tap, the + icon
- You’ll be presented with six options. The most relevant here is ‘Upload’
- Give the app permission to access your files if requested, then locate the one you’d like to upload
- Tap any file to upload it, or press and hold to select more than one at a time
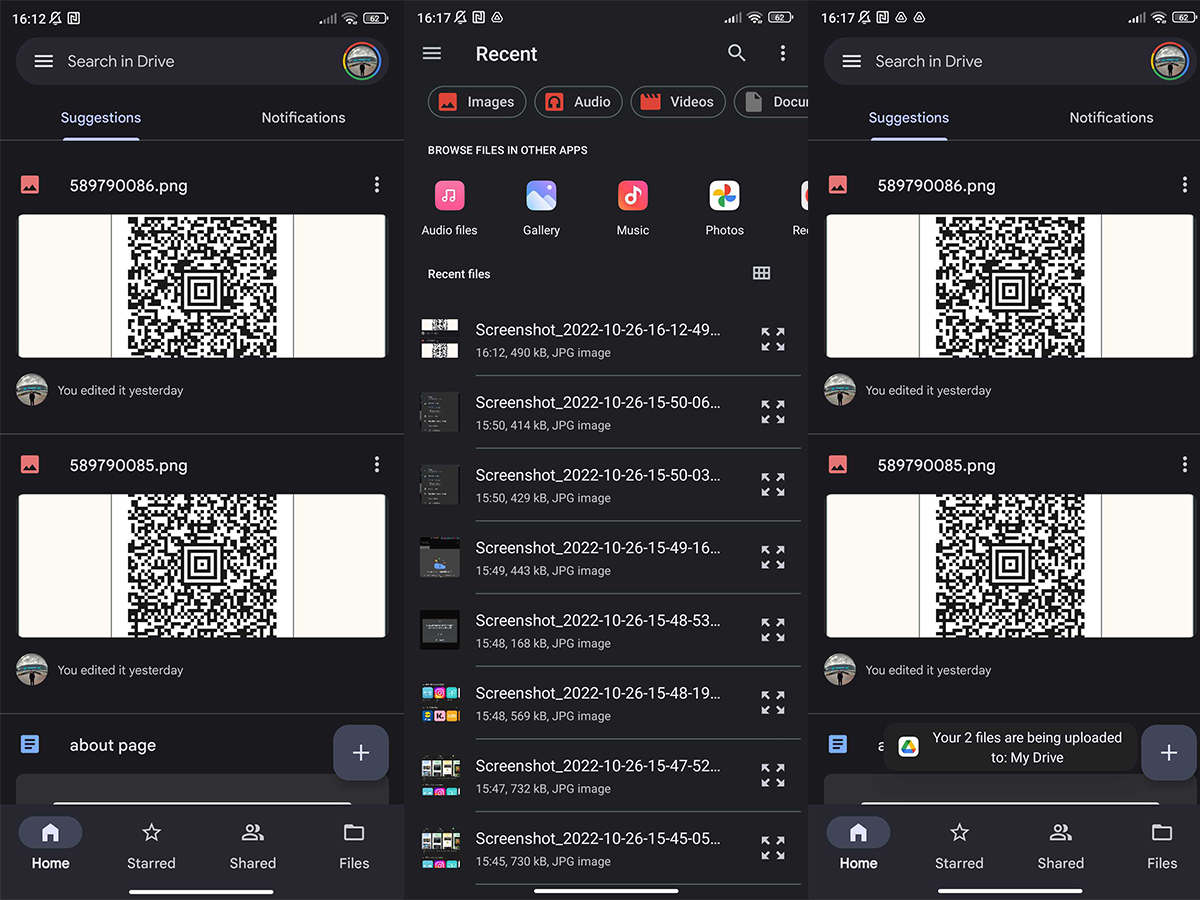
Anyron Copeman / Foundry
The files will now be uploaded to Google Drive and available across all your devices.
3. Delete WhatsApp media
It’s easy enough to stop WhatsApp saving photos and videos to your phone. However, did you know it also stores any media you send within the WhatsApp app itself?
Many of these are files you don’t want or need anymore, but there is a way to manage them from within the app:
- Open WhatsApp
- Tap the three dots in the top-right corner and choose ‘Settings’
- Tap ‘Storage and data’, then ‘Manage storage’
- You’ll be presented with a summary screen of all your chats and big files. Tap any one and choose which files you want to delete, or there is the option to ‘Select all’
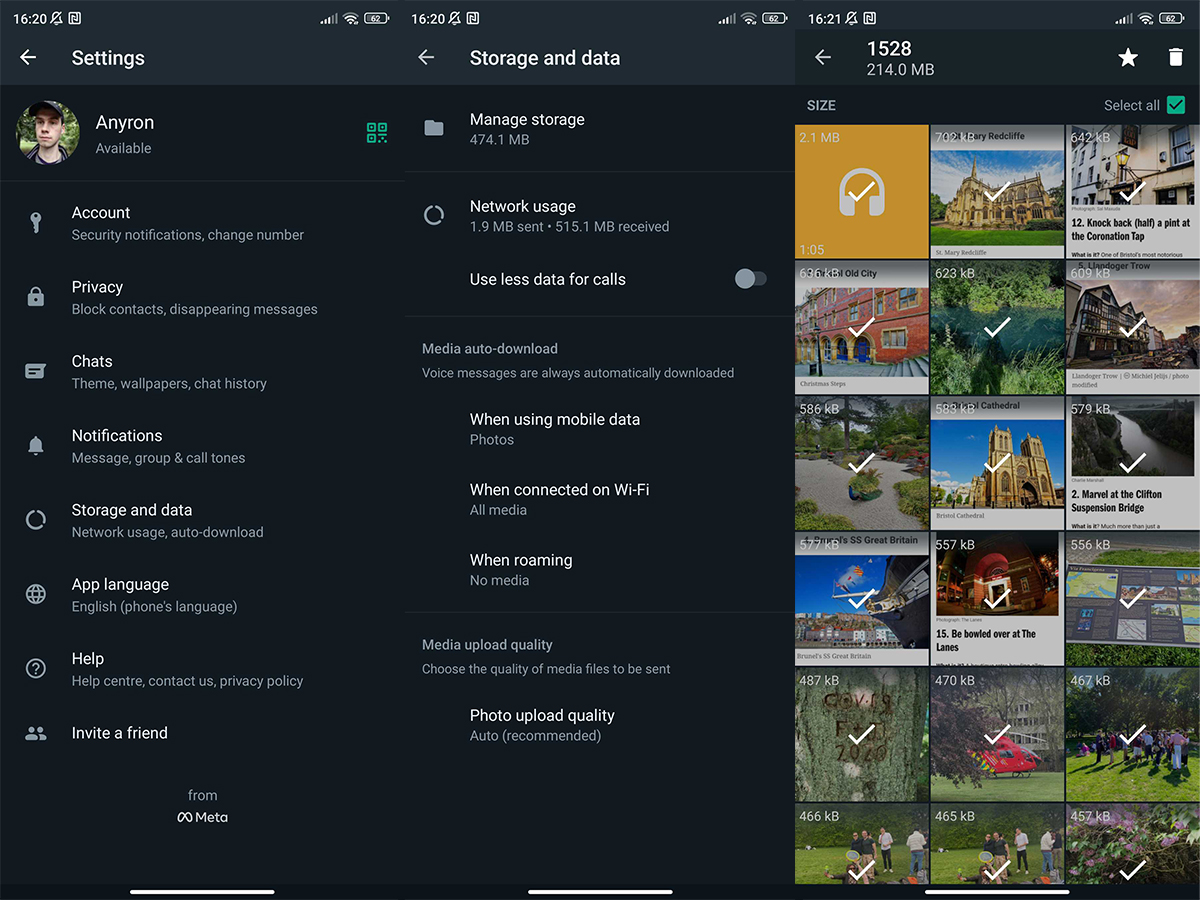
Anyron Copeman / Foundry
Learn more in our separate guide: How to manage WhatsApp storage
4. Delete your downloads
Everyone always forgets about downloads, which are often left behind in a forgotten folder long after they’ve been any use to you. If you don’t have a file browser app on your device, you can download one free from the Google Play. Now, search for the Downloads folder and ditch anything you don’t need.
However, it’s also worth deleting downloads from your web browser of choice. If that’s Chrome:
- Open the Chrome app
- Tap the three dots in the top-right corner and choose ‘Downloads’
- From the next screen, press and hold any files you want to delete and tap the bin icon in the top-right corner
You won’t be asked to confirm you’re happy for them to be deleted, so make sure you’re careful. The process will be similar on any mobile web browser.
5. Delete unwanted apps and games
Sometimes people think they’ve deleted all the junk they’ve installed through Google Play, and really all they’ve done is scanned their home screen for unused apps and deleted those they find there. Worse still, sometimes they’ve only deleted the shortcut icon, and the app is still lurking in the app drawer. Not all Android phones allow you to uninstall apps from the home screen.
The best way to unearth unused apps and games is to visit the Apps menu in Settings. You want to avoid deleting anything important just because it doesn’t seem familiar to you, so ensure you’re looking only at the Downloaded tab if your device offers such as option.
Alternatively, you can access a list of the apps and games you’ve downloaded via the Google Play Store:
- Open the Google Play Store
- Tap your icon in the top-right of the screen and choose ‘Manage apps and device’
- Tap the ‘Manage’ tab at the top of the screen and make sure ‘Installed’ is selected
- To uninstall any app, check the box next to it and then the bin icon in the top-right
- Tap ‘Uninstall’ to confirm
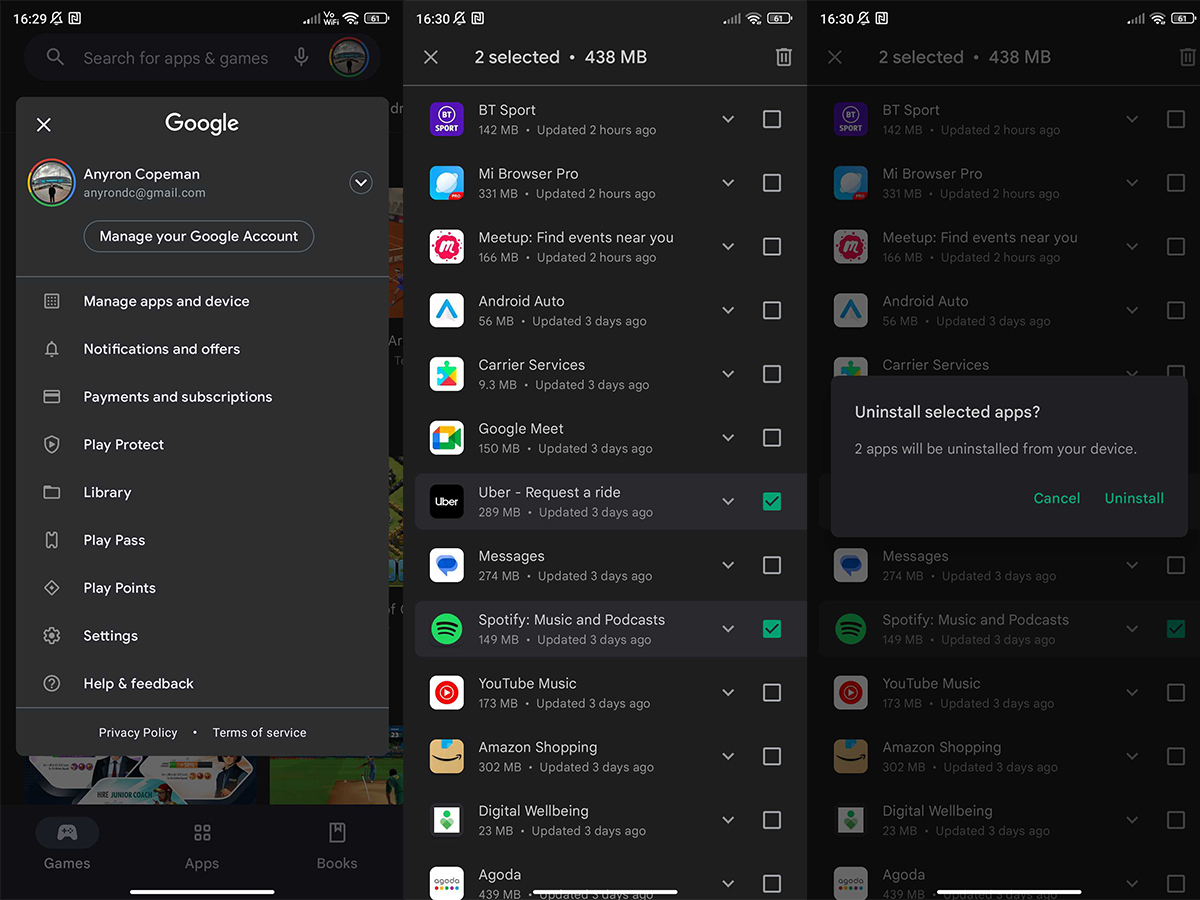
Anyron Copeman / Foundry
Don’t avoid deleting paid apps simply because you’ve spent money on them. Any previous purchases from Google Play can be re-downloaded at a later date free of charge.
Related articles you may like
Author: Anyron Copeman, Mobile Editor, Tech Advisor

Anyron is Mobile Editor at Tech Advisor, where he’s been a mainstay of the editorial team since 2019. In his current role, Anyron is responsible for all smartphone, tablet and mobile network coverage on the site. A BA Journalism graduate, he has experience with a wide range of consumer tech products and services, including smartphones, tablets, foldables, wearables and more.